These look pretty slick, and useful. Might have to pick one up sometime.
Be the first to comment
These look pretty slick, and useful. Might have to pick one up sometime.
http://www.garagejournal.com/forum/showthread.php?t=29941
During our move to the new house, about three years ago, I managed to misplace the set of spring clips that hold the drawers in my old Craftsman toolchest. I was disgusted by the thought of paying $4 each for replacements, as it would quickly exceed the value of the chest at two per drawer. It was nice to run across this forum link and see that Waterloo manufactures a suitable replacement for less than half the cost. I’ll be calling them when I get an opportunity.
I’m still going to be upset with myself when I find the plastic bag with the ten originals.
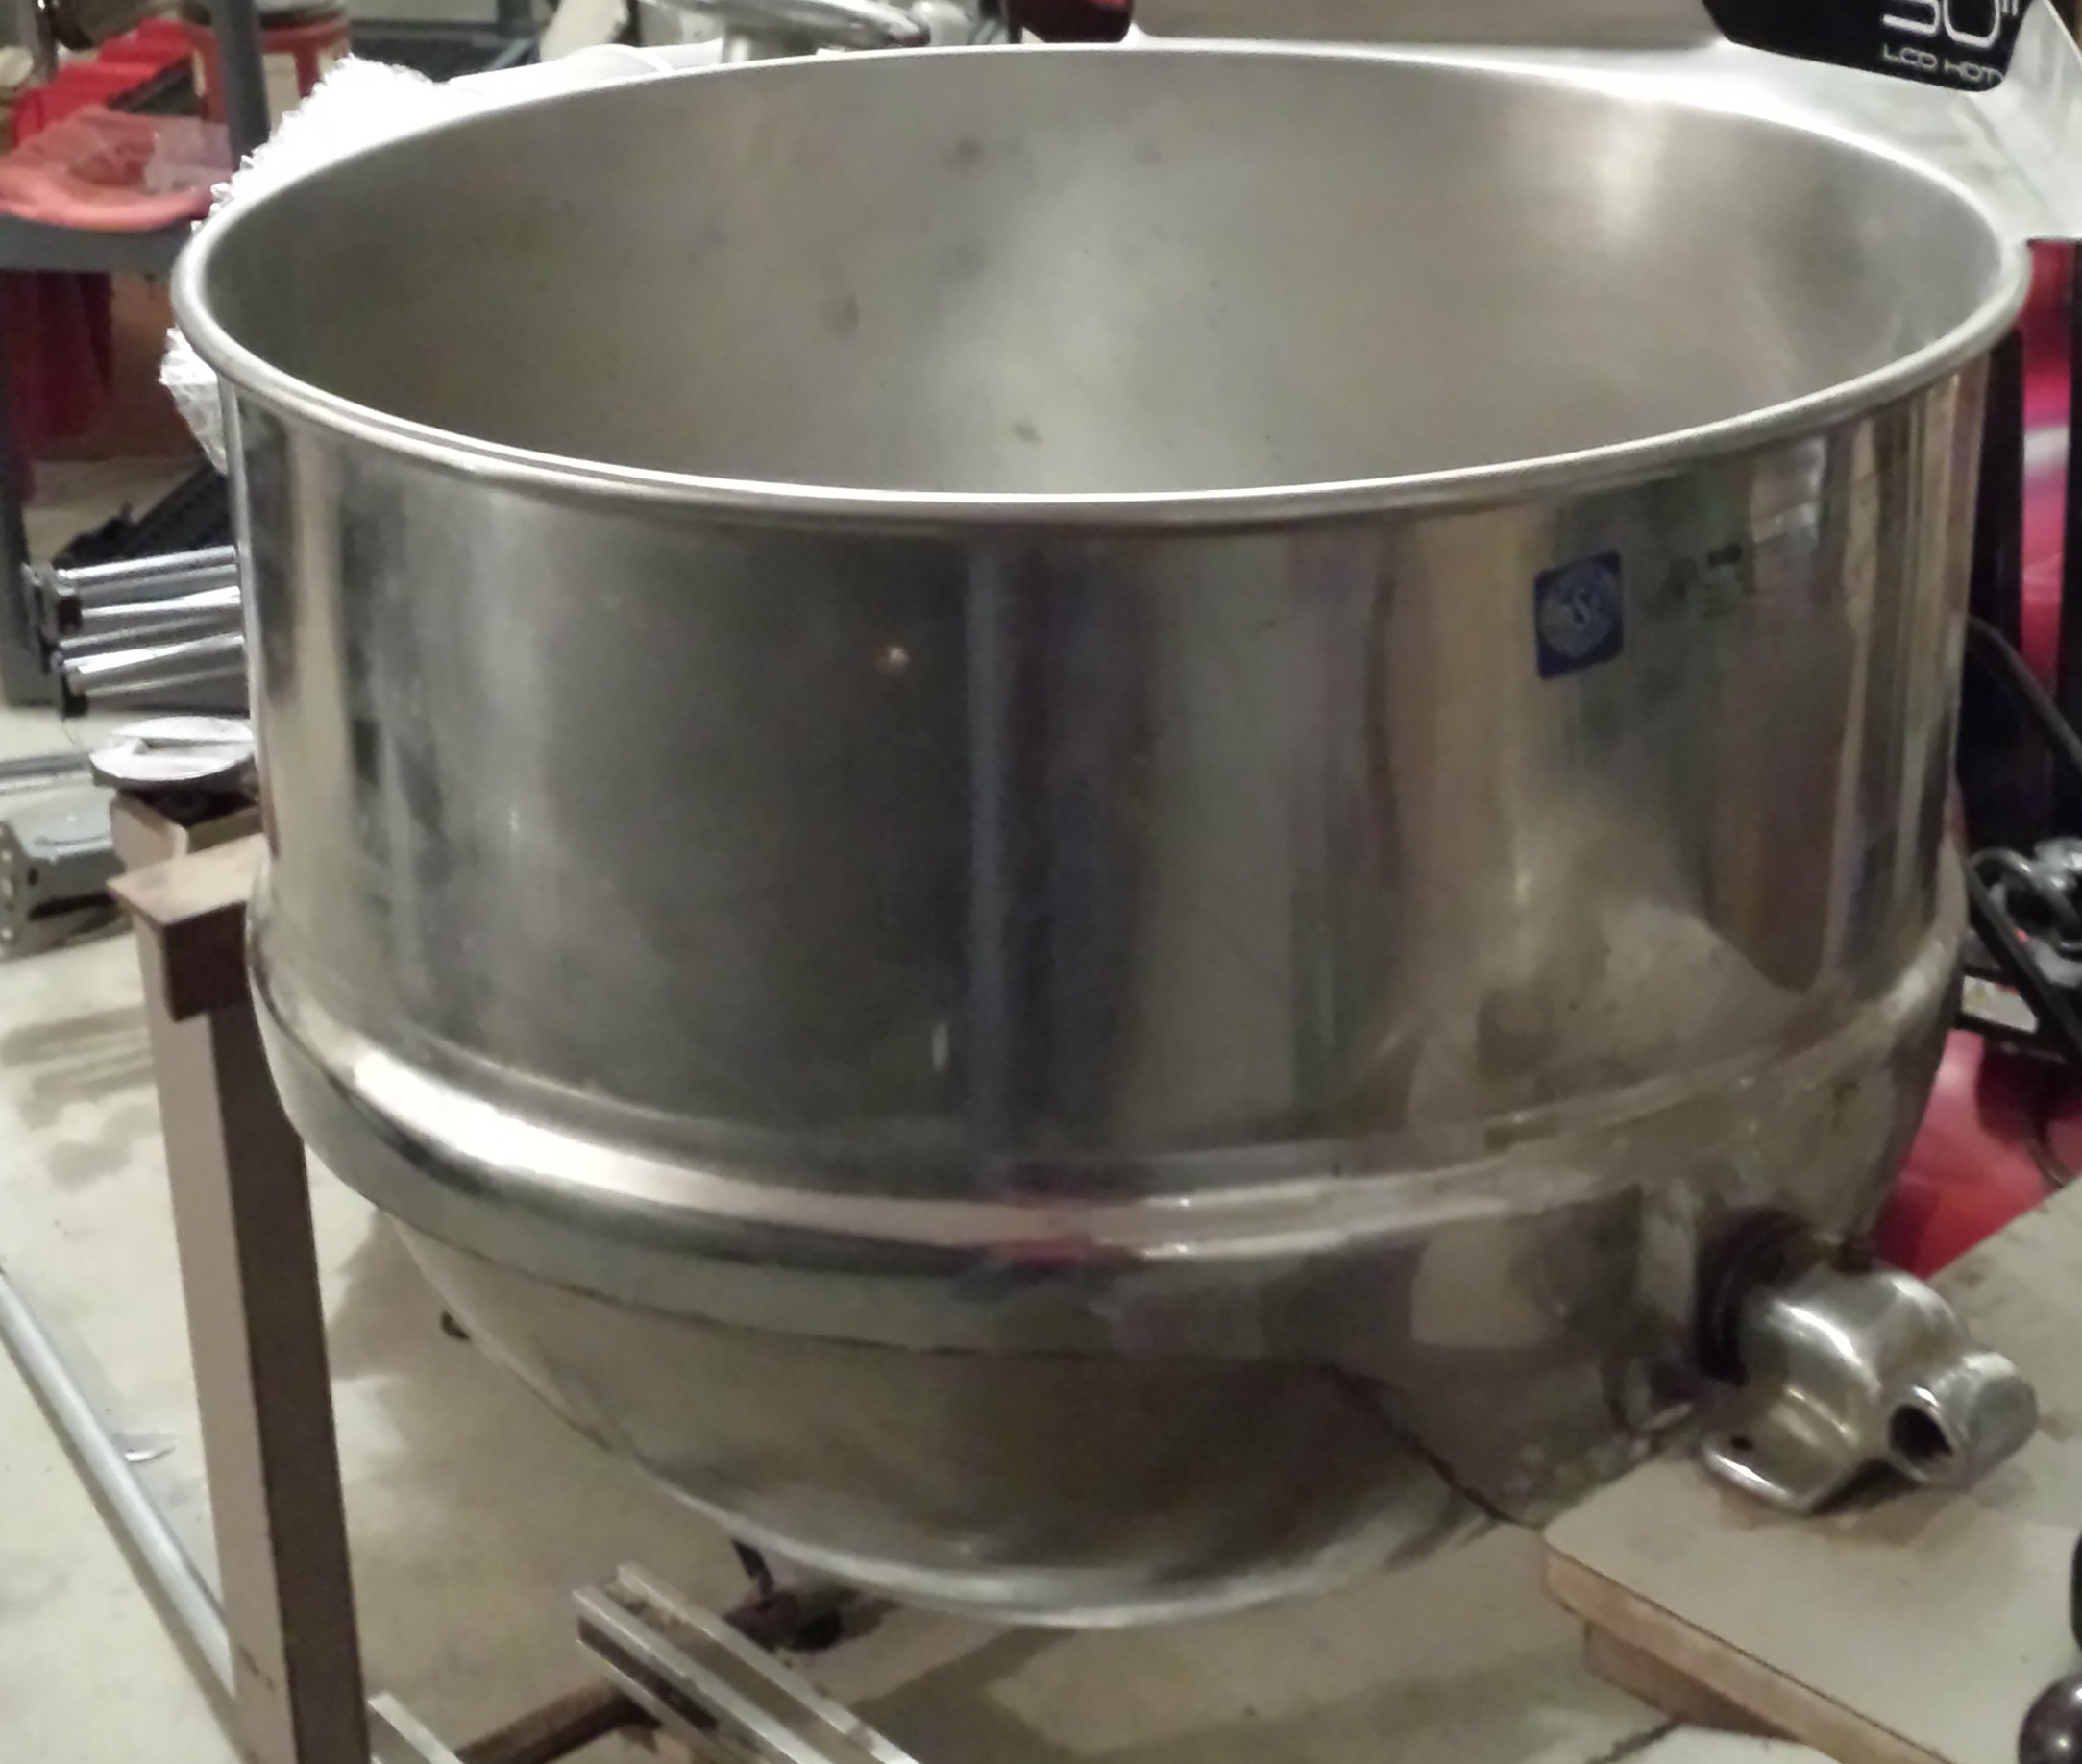 I mentioned in a recent post that I had come into the opportunity to use a nice size stainless steel (formerly steam jacketed) pot as a brew kettle. My initial thought was that I needed to purchase a considerably larger propane burner with a much higher BTU output, but a friend who has recently completed an electric setup in a converted 15 gallon keg brought up the possibility of crafting a heat stick.
I was somewhat familiar with electric systems from hearing his progress as he went through the build process, but was unfamiliar with electric heat sticks. The gist of the idea is using a heating element from an electric water heater as the heat source for a boil kettle. Perfect for a setup with a borrowed kettle that I don’t want to modify!
There are a number of reference articles, posts, and threads for building full electric systems with kettle-mounted elements, but brewing with heat sticks seems to be a somewhat newer trend. Even so, there are a number of designs in existence. The latest generally seem to use an ultra low watt density element, though there are many reports that the regular elements are perfectly suitable and don’t impact even very light lagers. I’ve already found an element that I think will be suitable assuming I have sufficient watt output.
This post is another of my evolving “project in progress” posts, so it will change and evolve as the project moves from research, planning, and design through the build, test, and finalization phases.
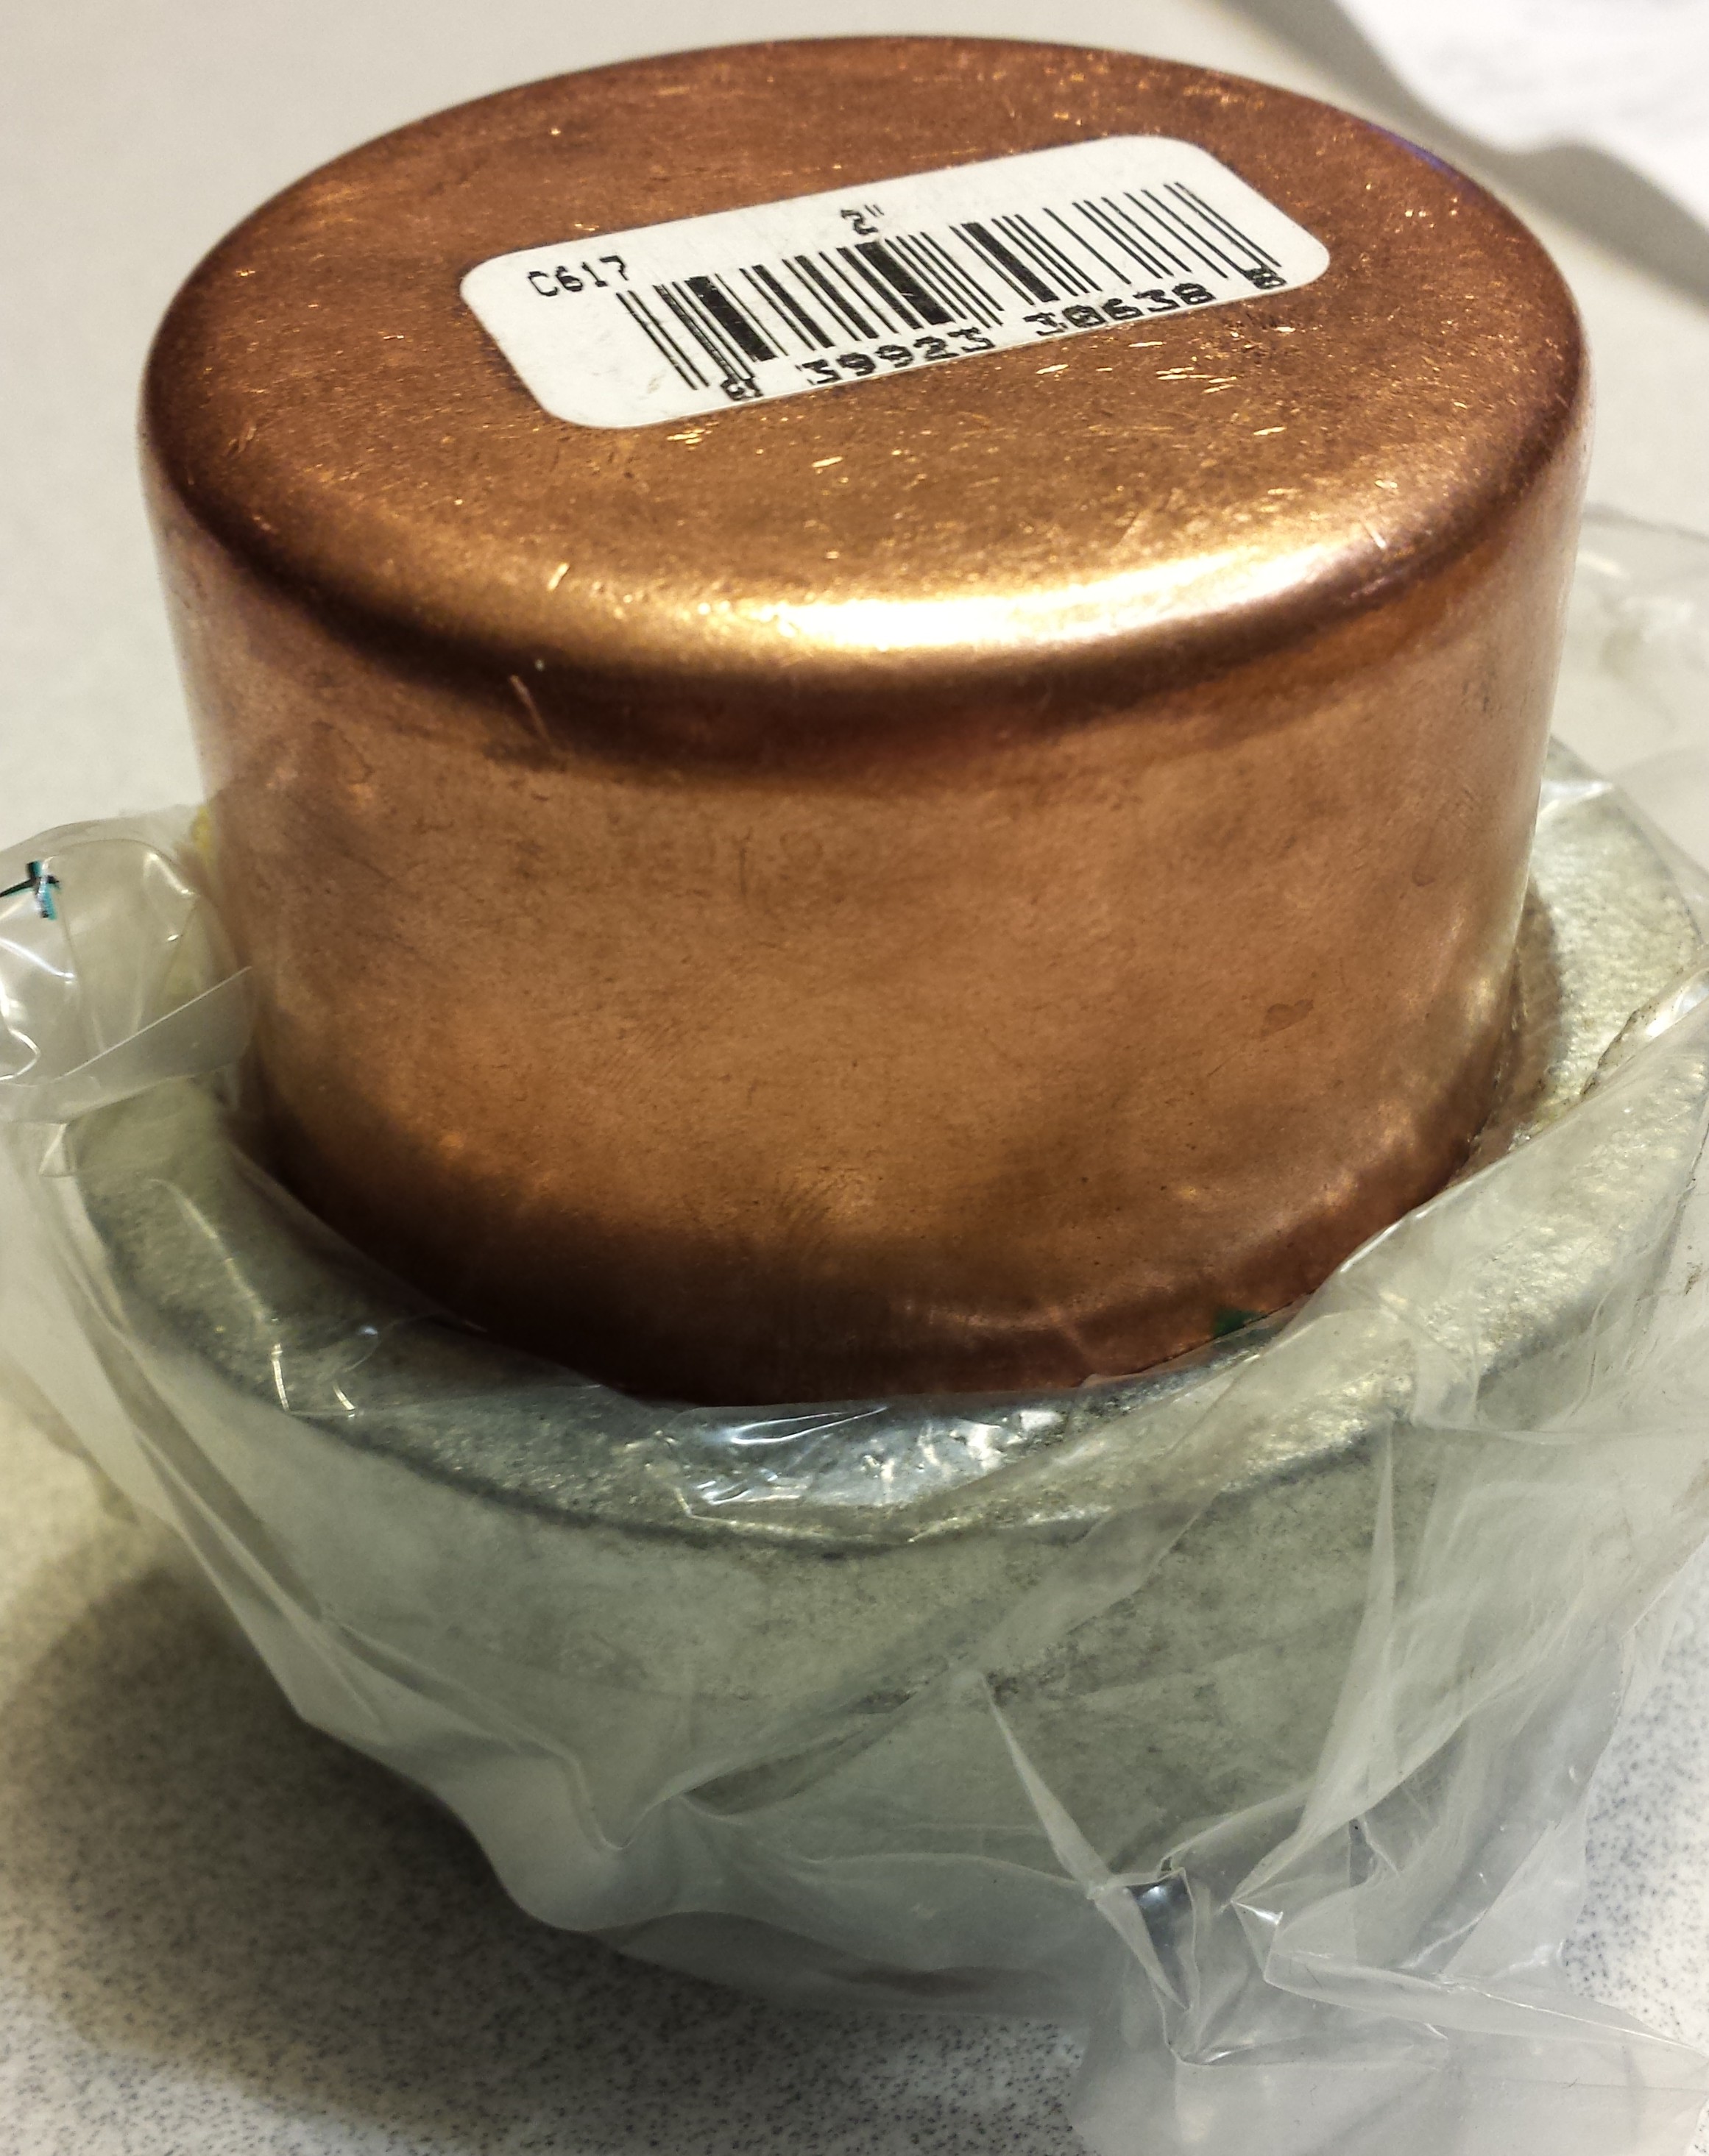
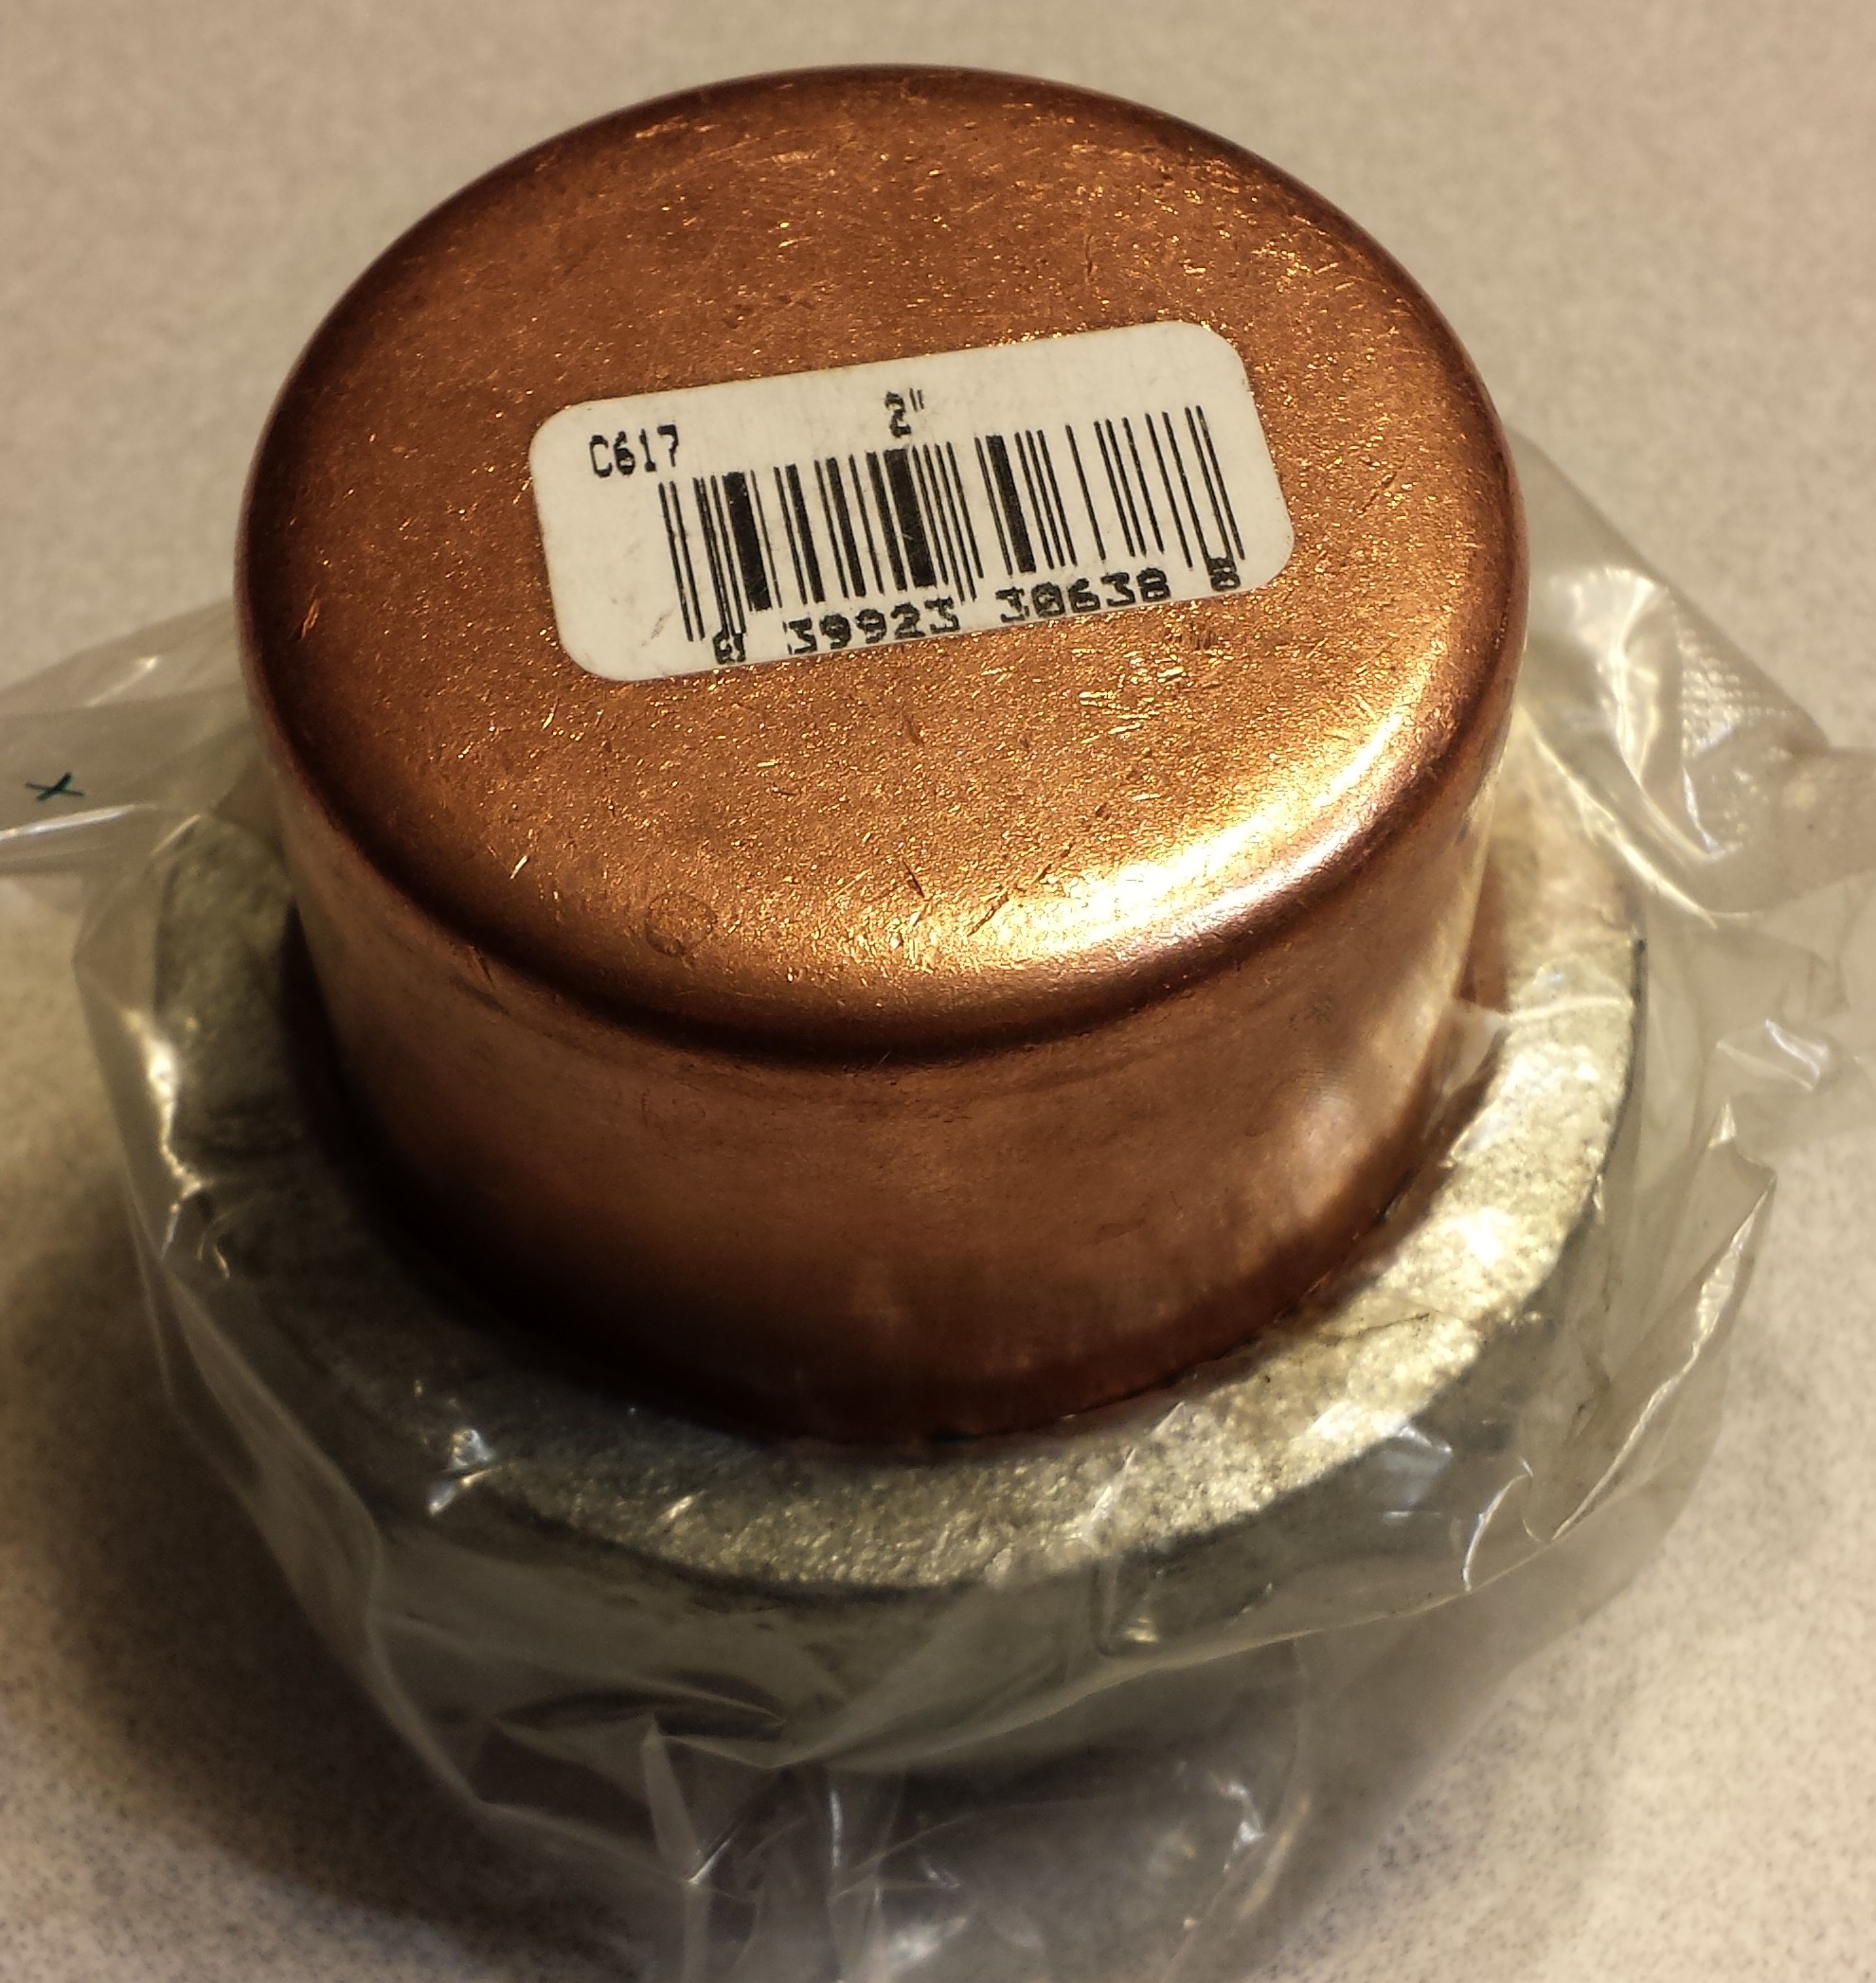
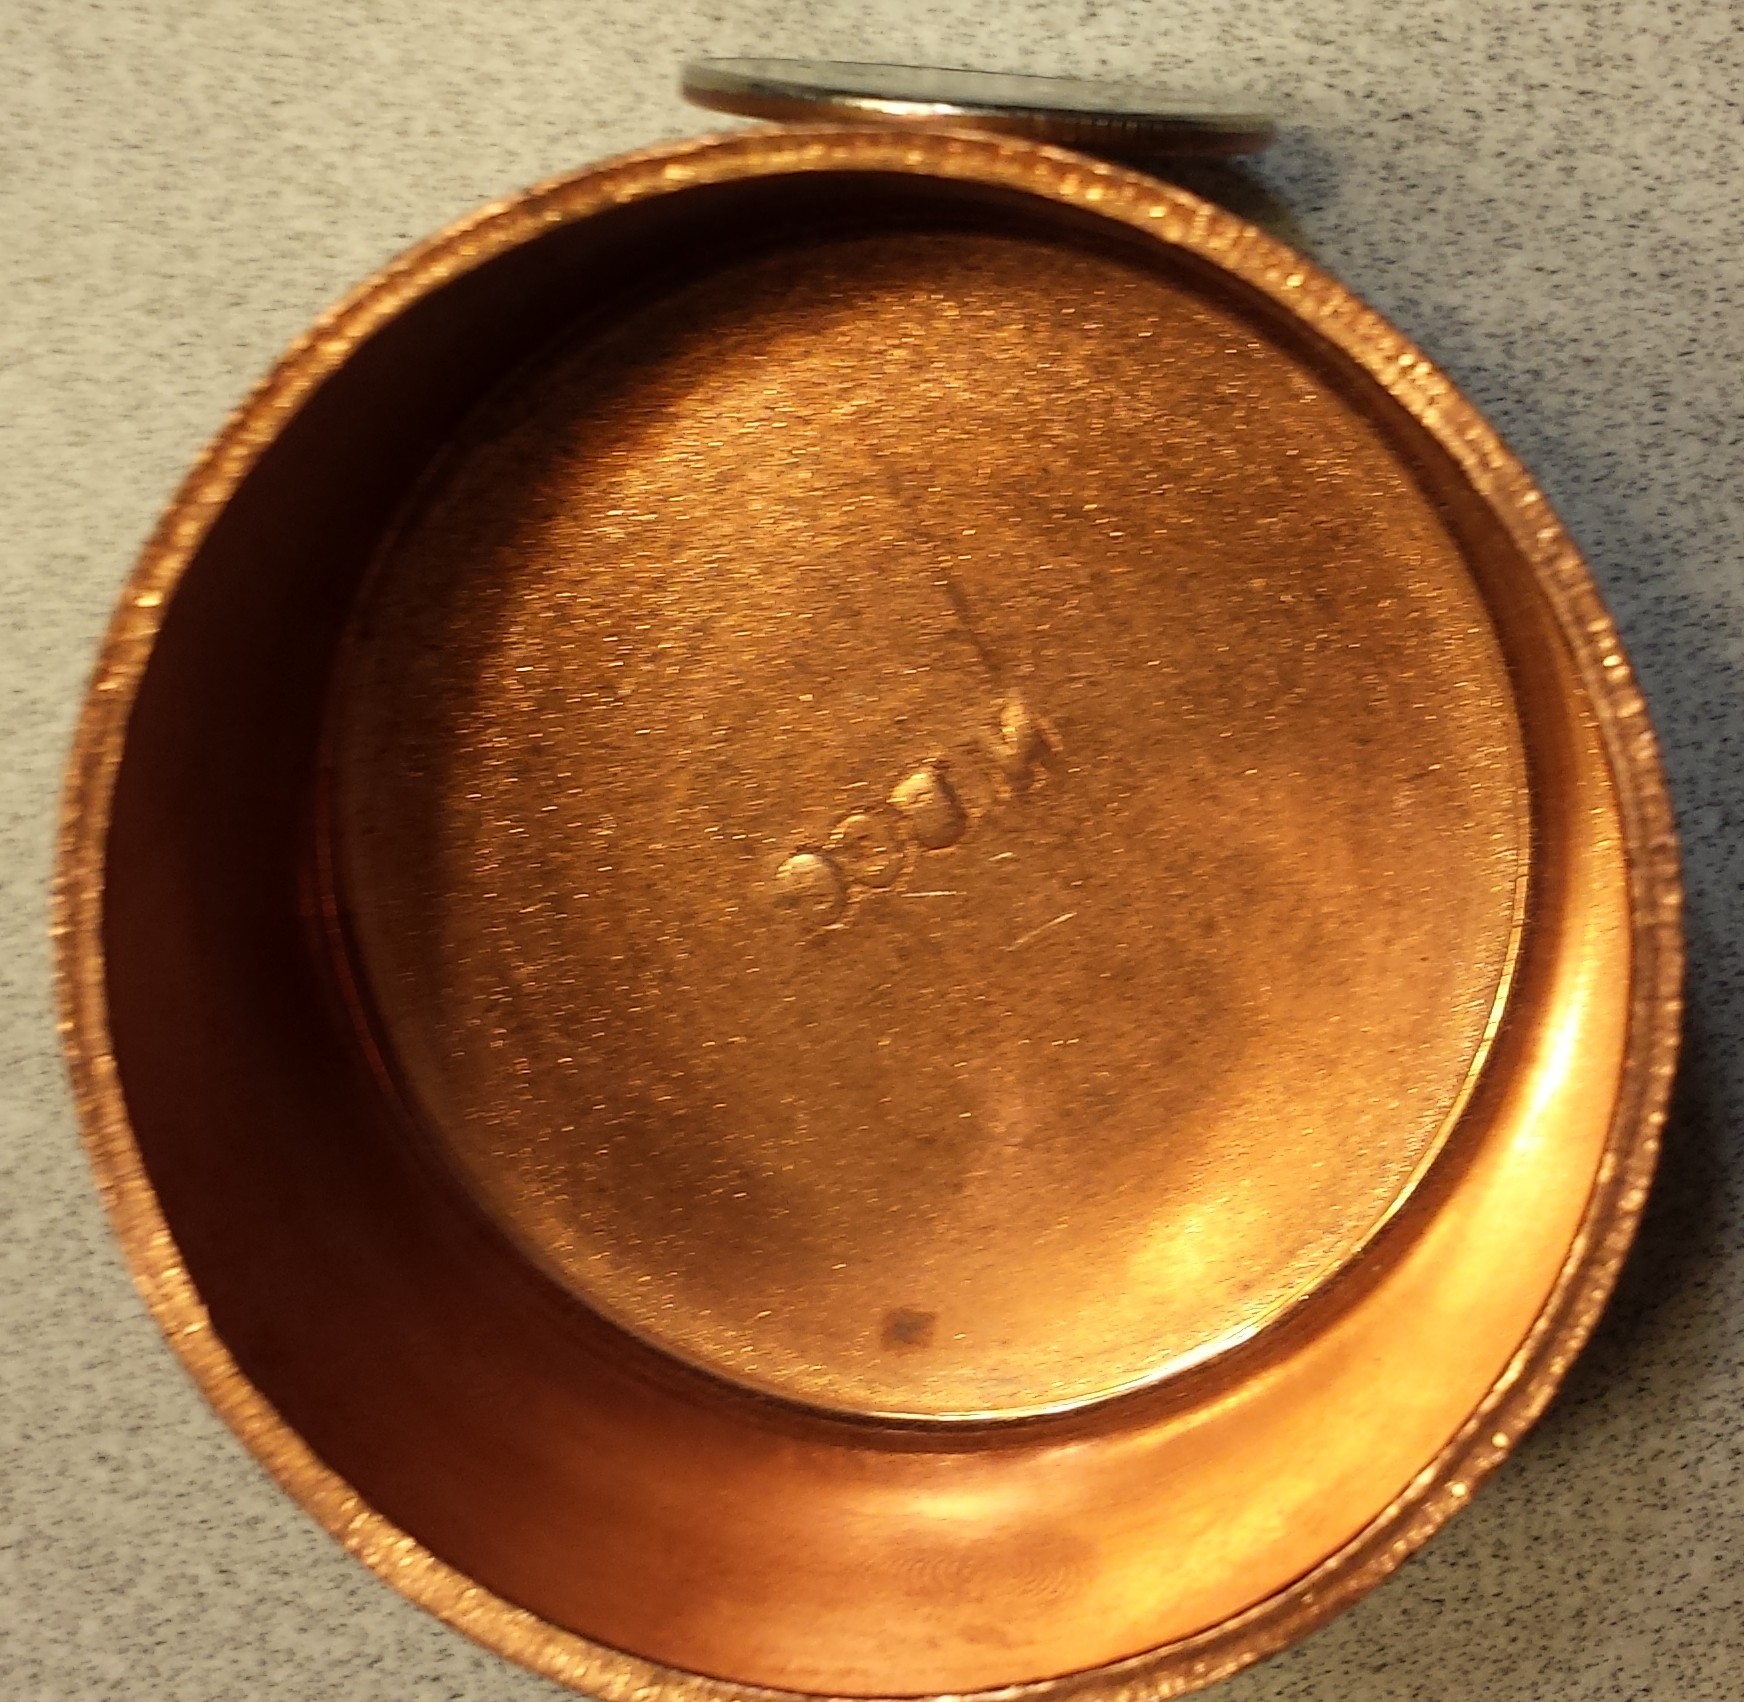
One of my thoughts was to thread (NPT) the outside of a 2″ copper endcap, apply teflon tape, and thread it into a 2″ stainless steel endcap. I would bore a centered hole in both caps, and the copper cap would be threaded onto the heating element, flat side toward the element. An elbow would be threaded into the stainless steel cap and attached to a piece of stainless steel pipe through which wiring for the element would have been run.
I believe I have a threader which would have allowed me to thread the copper endcap, but I had several concerns about the longevity of the design in addition to the questionable cost-effectiveness. Even Chinese stainless steel 2″ endcaps are north of $20, and that would not include any boring/threading/machining. I was also concerned about the durability of the union between the relatively thin copper endcap (shown with a quarter standing beside it in the picture above for comparison) and the threaded fitting of the element.
This post is part of a collection of brewing equipment purchases describing what, where, why, and when of brew gear I believe will provide value, enjoyment, or increased efficiency in my brewing processes.
Sensory training kit for recognition of most common/important flavor elements in beer
To be able to recognize the characteristic flavors in a beer, good or bad, and to better understand their contribution and recognize them in my own beers. Flavors include:
Some time after I have some experience and ten to twenty friends who also want to get a better grasp on the flavor specifics and are willing to chip in to make the purchase.
These prices reflect bottom dollar including any known or reported applicable coupon codes. For this particular item, my initial notes don’t show many alternatives, though there may be alternative ways to get a good approximation of some of the concentrates.
Other purchases that come into consideration to take maximum advantage of the benefits of this item.
This post is part of a collection of brewing equipment purchases describing what, where, why, and when of brew gear I believe will provide value, enjoyment, or increased efficiency in my brewing processes.
Kenmore 8.8 cu ft chest freezer – Model 16949 (black, preferred) or 16942 (white)
This keg layout diagram indicating six to seven ball lock/pin lock kegs plus a CO2 tank (with a 7″ collar), in combination with the small footprint that fits neatly in the space between my foyer, living room, and kitchen. I’m sure there are some other models that offer similarly good layouts but I haven’t run across them yet. Black is preferred because it’s a good aesthetic fit with the rest of my appliances, though it’s possible I will build a facade for it in any case. I like Kenmore, and the value for the space is hard to beat at the right price.
I’m not very likely to just drop $200 without a game plan, so I need a good reason and an achieved savings goal or a windfall before this one becomes likely. Reason is simple to come up with for this one, though it does require some follow-through on my part: the potential for low-cost/barter use of half a dozen or more kegs. There’s not an immediate urgency, though; while it would be nice to have a half a dozen varieties on tap, I could get by with one or two on a picnic tap in my spare refrigerator while I save my pennies. Not to mention the time and additional expense to fully outfit the box with a collar, thermostat, CO2 manifold, lines, faucets, and all manner of accouterments. That said, if that historic low price comes around again, I might be able to put a deep freeze to use in the interim.
Update: This went on sale at $229.99 on 12/24/2013, and I was able to use a coupon code for an additional $25 off that price, plus will get back around $7 in KMart/Sears reward points and 5% on my credit card promotion.
These prices reflect bottom dollar including any known or reported applicable coupon codes.
Other purchases that come into consideration to take maximum advantage of the benefits of this item.
I’m not far into my brewing journey, but I am already hooked on the process. It’s a terrible hobby for me to get involved in, given the endless minutiae that can change the essence or the entire character of a brew. I can lose hours and days reading about the steps in the process, thinking about the optimizations of the mash temperature rests to optimize alpha and beta amylase (which others have doubtless already optimized far better than I am likely to be able to do, since they have a significant monetary incentive to do so!), and re wording countless measurements and statistics for each batch. I’m definitely not retaining everything I read, hear, or talk about yet, and I’ll probably never achieve a perfect retention, but I certainly find it interesting.
Along with that, there seems to come a natural tendency among most of the homebrewers with whom I am acquainted towards process optimization and efficiency and consistency improvements – which naturally lead to fabrication. This is a hobby which it is incredibly easy to spend an enormous amount of money very easily; on more than one occasion I have found myself contemplating the purchase of a TIG welder in order to “repurpose” old restaurant fixtures into brewing sculptures of innumerate purposes. It’s an ongoing effort of the will to remind myself that I can accomplish a perfectly adequate extract or partial mash with just the 22 quart pressure cooker I use as a kettle and the Darkstar burner I got with my starter kit from Midwest Supplies. Though I will need to get a funnel at some point to support easier transfer into a carboy if my plastic pail primary is full, and a large sieve would prove helpful if I end up doing a partial mash oatmeal stout again, and if I’m ordering those things I should go ahead and get the parts to make a dip tube for my bottling bucket, and… well, it keeps going along those lines. And that doesn’t even take into consideration the desire to have a kit on hand if I have the time and motivation to brew!
Taking into consideration the equipment I already possess, improvements in my processes that could be achieved with small purchases, a promising opportunity to be able to keg my batches with minimal upfront expense through an offer to borrow/barter, and charges for shipping, I have come to the realization that it’s time to establish a plan, or at least an outline, so I’m better prepared and more focused in the face of inevitable future purchases. Otherwise it’s simply too easy to look at the daily deals on homebrewfinds.com and find myself building a cart that I ultimately won’t purchase because I have no realistic plan or goal established for the purchases.
My goal with this post is fourfold: To establish a list of purchases I can foresee making, and a potentially dynamic order for making those purchases based on a combination of need, funds availability, and maximal value; to centralize a list of products I have seen that provide potential improvements in efficiency, quality, or experience, and what purpose or return would be achieved through the purchase (potentially in comparison to similar products and establishing a reference for the superiority of a selection to a similar product); to establish a price history for use in determination of optimal valuation; and to facilitate the reduction of value loss to shipping charges by consolidating multiple items when feasible.
I checked out a few table and spreadsheet plugins that would facilitate this, but none seemed to be the fit I was looking for (all of them left me thinking about simple tie-ins to Google Docs or much more complex builds using Xataface). Instead I think what I’ll do is just maintain a list here, perhaps tied into a spreadsheet at some point in the future, with links to pages that house the details.
http://www.homebrewfinds.com/p/homebrewing-related-amazon-fillers.html
Lots of useful stuff here. I really shouldn’t bookmark it, as that makes it way too easy to come back and spend money…
You are currently browsing the archives for the To Buy category.